Now that I'm all caught up on e-designs, I am able to accept new projects! I am still running this special promotion, so contact me NOW to take advantage of this great deal! More info here.
THE STYLING BEGINS {One Room Challenge Week Four}
What a week it's been! Design projects have taken center stage around here lately, so progress in our family room was quite limited. But I did get around to doing a little styling!
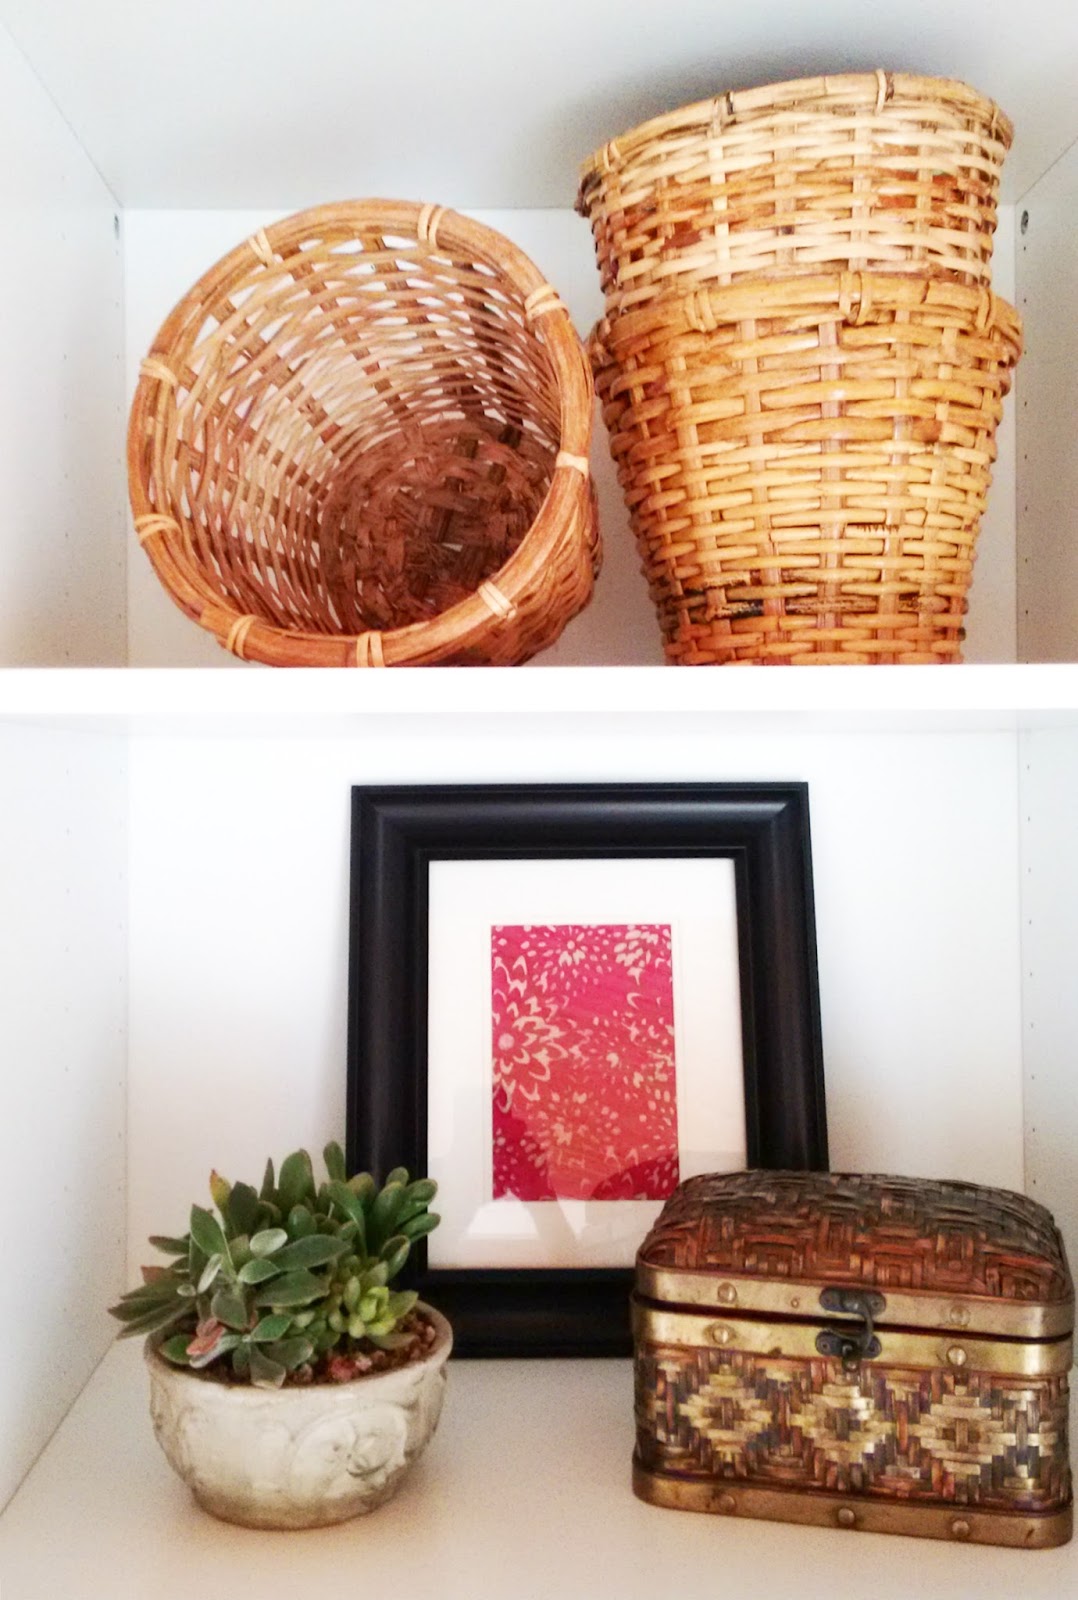
Last weekend, I worked on styling the built-in cabinets that my handy hubby DIY'd. I spent some time curating each shelf, stepping back, then moving things around to get just the "right" balance and groupings. This process was on repeat pretty much all weekend. For those who know me, thisinsanity comes as no surprise. Ha! I continue to tweak the shelves... :)
A "challenge" that I self-imposed when it came to accessorizing the built-ins was that I couldn't spend any money. What?! You heard me right. I'm crazy. Shopping for anything home-related is one of my favorite pastimes, so it was an exercise of willpower AND creativity to get these built-ins styled. #goodonthewallet #happyhusband #crazywoman
"Shopping" our possessions made me look at what we already owned in a creative light. This process also forced me to unpack boxes that have been in storage since we moved here two years ago. It was fun to rediscover forgotten treasures, especially those from our travels.
I even framed some pretty silk paper for a dose of colorful art...
A peek into a few other elements that may go into the room...
Sadly, it is not in the budget to refurnish the room at this point (the current furniture will eventually go into our empty living room, where it is better suited). I am, however, hoping to find an affordable accent chair(s) NOW to round out the seating area. Task lighting, wall decor, and textiles are also making its way into the space!
Last weekend, I worked on styling the built-in cabinets that my handy hubby DIY'd. I spent some time curating each shelf, stepping back, then moving things around to get just the "right" balance and groupings. This process was on repeat pretty much all weekend. For those who know me, this
A "challenge" that I self-imposed when it came to accessorizing the built-ins was that I couldn't spend any money. What?! You heard me right. I'm crazy. Shopping for anything home-related is one of my favorite pastimes, so it was an exercise of willpower AND creativity to get these built-ins styled. #goodonthewallet #happyhusband #crazywoman
"Shopping" our possessions made me look at what we already owned in a creative light. This process also forced me to unpack boxes that have been in storage since we moved here two years ago. It was fun to rediscover forgotten treasures, especially those from our travels.
I even framed some pretty silk paper for a dose of colorful art...
A peek into a few other elements that may go into the room...
Sadly, it is not in the budget to refurnish the room at this point (the current furniture will eventually go into our empty living room, where it is better suited). I am, however, hoping to find an affordable accent chair(s) NOW to round out the seating area. Task lighting, wall decor, and textiles are also making its way into the space!
Come back next week for my last sneak peek... and then the full room reveal in TWO weeks! Don't forget to visit Calling It Home to see all the other wonderful ORC projects.
One Room Challenge {Week Three}
We finally checked off the rest of the remodeling "finishing" details in our family room this past week! Baseboards are installed and the dutch door is refinished. It may not seem like a huge accomplishment, but those two things have been neglected forever for several months. With the room's "shell" now mostly done, focus can really turn to the decorating process during the rest of the ORC!
Our dutch door was transformed from this...
...to this!
What a difference paint can do, right?! The door was one of the original room elements that I wanted to keep, despite its rough condition. It's real wood and very solid. I also love the idea of being able to have open air flow while maintaining some privacy simultaneously.
This door required a lot of elbow grease to give it new life. It took me about 5 hours (sanding, prepping, painting) to refinish it. That is probably longer than average, but there are A LOT of nooks and crannies on this door! Sanding and prepping took the bulk of the time, given all the beveled edges on the upper half of the door interior and exterior sides.
I also painstakingly removed some "glue-y" residue that existed where the trim joints meet, and gave the entire door a good cleaning before it was painted. I painted both sides with black exterior paint in a satin finish primer was built in.
The refinishing process actually started off with quite the mishap. The top half of the door came "flying off" when I took it off the hinges for sanding. Our antique piano, which sits adjacent to the door, just got more distressed as the door landed on it and left a huge gash. #sadface Somehow, our new wood floors escaped pretty unscathed. #relieved
While I tackled the dutch door, my hubby installed the baseboards...
We chose 4-1/4" wide boards for the entire house. I think moldings are like jewelry to an outfit. They help provide the finishing touch.
Three weeks down, three to go...with still so much left to do! Thanks again to Linda at Calling It Home for providing the motivation to pull this room together, and to all of YOU for following along!
DIY Fireplace Mantel Stain
As a complete novice DIY-er, I try to stick to more straightforward projects... projects like staining a wood mantel. During the family room remodel, my hubby had built a new fireplace mantel to replace the old lopsided one. I finally tackled the staining of it a couple weeks ago, thanks to the push from the ORC. Nothing like a deadline to get things moving!
In one afternoon, the mantel went from unstained, unfinished pine...
...to a rich-stained, finished wood mantel!
It was a simple DIY that provided immediate gratification, aka my kind of project!
Here are the materials I used to stain our fireplace mantel:
Also make sure you are working in a well-ventilated area and/or wear a mask!
For this project, I applied two coats of stain and two light coats of polyurethane. This is the procedure I used:
It should also be noted that the stain I used already had wood conditioner mixed in. It worked fine for my purposes since I was working with virgin pine wood. However, although I am not a seasoned DIY-er, I think it may probably be worthwhile to apply wood conditioner separately on staining projects in which you are refinishing previously coated wood.
ONE ROOM CHALLENGE {Week Two}
Hi everyone! Thank you so much for all the kind comments regarding the transformation of our family room thus far. The room has certainly come a long way, and we're grateful to be past the construction.
Last time I left you, our family room was quite the empty "shell" waiting for some design/decorating love. The room is slowly coming to life since we moved furniture back into the space. We also tackled some DIY projects this past week.
Last time I left you, our family room was quite the empty "shell" waiting for some design/decorating love. The room is slowly coming to life since we moved furniture back into the space. We also tackled some DIY projects this past week.
The television is up, aka the most important "thing" in the room for my hubby! He had built out the top half of the fireplace during the remodel so that all the cords and electrical would be concealed - which is exactly what I wanted. He also added flat trim to the wall panel to inject some surface depth and dimension.
Oh hey...we finally have a mantel too! Last weekend, I had a date with the unfinished fireplace mantel that my hubby had built months ago. I stained it in "Kona", which resembles a deep espresso. I love the tone! It was a simple DIY project which I'll share about in a separate post.
The fireplace brick also got a makeover. For those who have been reading awhile, you know I was uncertain about whether or not to paint the brick. Well, after I applied the first coat of stain on the mantel, I immediately knew the brick wouldn't work in its original state. So my hubby and I "whitewashed" over it to give it a fresher look. He painted the brick, while I followed with a rag to gently "wash" it off. We used a 50/50 diluted paint/water formula at first (but it was looking too grayish), before beefing it up to a 70/30 paint/water mixture - resulting in a more saturated white wash. The fireplace now looks much better overall, but I definitely think I want to reface it down the road! :)
Molding matching that around the sliders was also installed around the original dutch door. Any guesses as to what I'll be tackling this weekend?! Yep... refinishing that door!
Some of the pretty stuff is also starting to trickle in...
There is still quite a bit left to do (and decisions to be made) over the next four weeks, but we made forward progress thanks to Linda's ORC! Come back next week for another update and more sneak peeks of the room. In case you missed it, here's the link to my One Room Challenge {Week One}.
FALL 2015 ONE ROOM CHALLENGE {Week One}
It is that time of year again, when designers and design bloggers take on the challenge of transforming a room within a six week timeframe - although it's technically only five weeks since the final week is the reveal! I enjoyed all the beautiful makeovers that occurred last spring. This time around, I'm taking the "One Room Challenge" over at Calling It Home and tackling a room in our home that's been taking us forever to complete: our FAMILY ROOM. There is nothing like a tight deadline to get things done!
This is my first ORC, and honestly, I'm feeling quite intimidated by the challenge. It didn't help that I decided to participate last minute like two days ago. I have general ideas for the room, but still need to finalize the design elements. My eclectic taste can sometimes make me indecisive when it comes to my own home. Nonetheless, I'm jumping in and hoping I land on my feet six weeks from now. Let's do this!
For those of you who are new around here, our family room has actually been going through a transformation since January - yes, 10 months ago! To our defense albeit limited, we didn't work on the space all summer long since the room was used to store furniture during our kitchen renovation. You can click here to catch up on all the details related to our family room remodel.
For those of you who are new around here, our family room has actually been going through a transformation since January - yes, 10 months ago! To our defense albeit limited, we didn't work on the space all summer long since the room was used to store furniture during our kitchen renovation. You can click here to catch up on all the details related to our family room remodel.
Here's a look at our family room:
It is a blank slate waiting for some decorating love! There are a few more remodeling details that need to be tackled, but now is a good time as any to start bringing the room to life.
Here are some true pre-blog "before" photos of the room we inherited from the previous owners:
It certainly has come a long way from its dark and dreary beginnings. I specifically saw a lot of potential in the "great room" when we first looked at our beloved fixer, so it's been nice to witness the ongoing transformation of this space.
As I talked about here, our family room needs to be functional and durable above all. It also needs to reflect our lifestyle and personalities. I'm striving for a collected, cozy, casual, and comfortable space. The room receives lots of natural light, and I want to maintain that bright and airy feeling by sticking with a neutral backdrop. Color, pattern, and texture will be injected through the decor/accessories. Somehow, I also want to incorporate and blend characteristics of traditional, rustic farmhouse, mid-century/modern, global, and bohemian/vintage into the space. I told you I'm eclectic! I'm thinking CLASSIC ECLECTIC MODERN BOHO FARMHOUSE. Well, something like that... Here are some inspiration photos:
Due to atiny limited budget, I'm going to work with most of our existing furnishings and dedicate most of the budget to accent pieces and accessories. We do plan to invest in some new furnishings down the road once our budget permits.
 |
| image via House and Home |
 |
| image source |
 |
| source unknown |
 |
| source unknown |
 |
| image via HGTV |
 |
| image via Decor Chick |
Due to a
I'll be documenting room progress updates every week, so I hope you follow along! Thank you so much to Linda for organizing this semi-annual event.
Kitchen-spiration
 |
| Royal Roulotte |
Black, white, wood is a winning combo. Love how the checkered-patterned floor tile continues up to the toe kick. Details matter! Check out the gorgeous home here.
 |
| via |
This is a beautiful Ikea kitchen renovation done by a super-DIY duo. It was done so quickly too. My favorite idea from this renovation was the side-by-side 30" gas ranges they put together to create a seamless, huge 60" range! It helps to partner with an appliance company. :)
 |
| via |
Another beautiful kitchen renovation. Would you guess Ikea was part of this remodel too?! The waterfall island counter is my favorite detail... what a stunning splurge!
Now I am even moreanxious inspired to finish up our kitchen. We're down to the backsplash and light fixtures!
Now I am even more


